
We recently talked about choosing a good case for your DIY PC project, and of course that’s all fine and well, but when you fill that beast with hardware, consider heat. The thermal realities of this world are a PC fanatic’s antagonist, always encroaching on performance and threatening to bring the whole caboodle crashing down.
Fans and heatsinks are your allies in the struggle for cool runnings, but this time we’ll focus on fans.
Primarily, fans can be divided into component fans and case fans. The former attach to various parts such as the CPU and graphics cards, even memory, while the latter are free standing units that bolt on to different panels inside the case to generate airflow in there.
Case fans
As the more primal of the bunch, let’s begin with these. As we said earlier, at least three are needed aside from any other fans you’ll have running. A front fan to provide intake, a rear exhaust fan, and one side intake. Some people prefer the side ones to be exhausts as well, but that depends on the size of your front intake. We’ll assume the side one is an intake for our purposes. Some cases allow for a top fan, but that’s extra and not that commonplace. Each one of these fans obviously needs a power source, so make sure your PSU or motherboard can accommodate them. 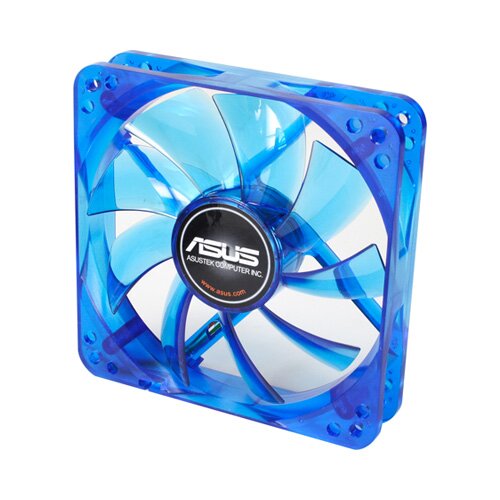
What to look for in a case fan?
First, the power supply, most of which are known as Molex type connectors. The more pins on the connector, the more potent and reliable the supply, allowing for more aggressive cooling. PSU connectors are usually 4-pin, while those on the motherboard may be only 3 pins.
Then, choose your size of fan. They range from 80mm to 250mm, but of course ascertain whether you can fit them. The bigger the fan the more air it pushes, but also the more noise generated.
Consider the bearing variety. Bearings are the mechanism inside the fan assembly by which the unit spins, and therefore responsible for the noise generated. Most fans have ball bearings, with the more “balls” the longer lasting the assembly. Ball bearings are stronger than cheaper varieties such as sleeve bearings, and last longer. For most people, these’ll do fine.
Pricier models go with fluid bearings and even magnetic technology, also known as SSO bearings. These have almost no contact between moving parts, thus they’re quieter and longer lasting. They also cost exponentially more.
Dust gathers on the blades of fans and inside their bearing housings to gradually tug on movement and cause problems, which has led some companies to offer so-called dustproof fans. These have better seals and angled blades that repel particles, so look for those if you’re into longevity.
Serious users should consider the RPM generated by the fan, again, the higher, the better for cooling, maybe not so good for noise. Mainline fans operate at 1000-2000RPM, while the behemoths of the field can spin at over 5000RPM.
Noise stands right next to heat as one of the unpleasant side effects of power computing, so anything under 20dB would be considered very quiet. Those are rare fans, the average noise footprint being much higher. The massive fans needed in more aggressive or professional systems frequently produce over 60dB of noise.
Component fans
Critical parts that mandate cooling are your power supply, CPU and graphics card. Now, these come with their own fans, and so the assumption here is that you’re interested in upgrading the cooling solution. Purists also add hard drive and memory fans, but that’s going the extra mile. Most aftermarket mods involve changing the CPU and graphics card fan.
 CPU fans come with or without a heatsink, and have a more towered or “ice box” design than other fans. The underlying factors are similar to case fans, so consider the size (50mm to 150mm, approx.) before buying. However, a big difference here is compatibility, which is related to size. Needless to say, the fan must match the CPU socket type, i.e. LGA1156, AM3 etc. Establish which one your CPU belongs to before buying! We recommend fan and heatsink assemblies wherever possible for much more efficient heat dispersal.
The next most popular component to cool are graphics cards. For these, we go back to very similar technology as found in case fans, so think bearing types and RPMs once more. Size isn’t too big a consideration, they’re largely standardized to fit your average AMD/NVIDIA PCB, but check on the box or in details for supported graphics card model ranges. Like CPU fans, some VGA coolers add heatsinks into the mix, which is great but takes up more space. Because your graphics card attaches to an expansion slot, adding fans and coolers will take up one more slot on top of the graphics card itself, so make sure you have the room.

Photo courtesy Zalman Technology Company
Good cooling can make or break a system, especially if you’re considering overclocking and prolonged, heavy duty gaming. Keep all this in mind and also remember this is but an intro, there’s much more to it than meets the blade!


