Using the right software is just as important as buying the right hardware. It can improve not only how well your computer runs, but also the whole experience and even something as essential the battery life of a notebook.
Plenty of us enjoy video playback on our computers – whatever the format of your consumption, be it DVD, Blu-ray, YouTube or even .avi/.mkv (file types) – still using the right software can improve the quality of the video you watch: it’s not just about the source media.
Almost every graphics chip in PCs these days has a small engine to specifically decode video – this improves performance making playback smoother and because graphics cards are designed from the ground up to do special wizardry, they can add post-processing effects and cleaning to “noisy” video with ease. The downside though? It requires specific software to take advantage of it.
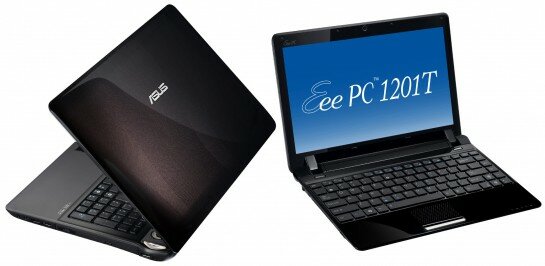
Software such as Media Player Classic: Home Cinema edition and VLC are completely free and have the right code built in to make use of the special hardware packed into popular graphics chips – such as those used in Nvidia or ATI graphics cards in your PC, or even notebook graphics like Nvidia Ion (used in ASUS’ Eee PC 1201PN Seashell for example) or ultra thin notebooks (like ASUS Eee PC 1201T) or notebooks with discrete graphics (like the fantastic sounding ASUS N61Jv).
It still takes a little tweaking to setup though, but we’re guide you through each:
Media Player Classic: Home Cinema Edition
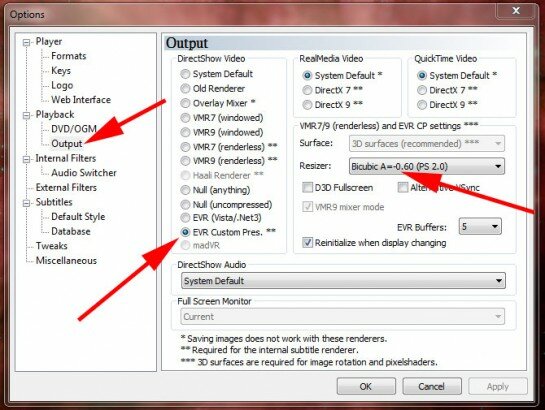
Firstly install Media Player Classic: Home Cinema edition from the link above, then select view from the menu and options at the bottom. Now click on the Output option on the left and you should be presented with this screen:
Notice the EVR (Enhanced Video Renderer) option is selected – that’s all that’s needed to use the graphics card in Windows Vista and 7. If you want better quality video when you upscale standard definition to high definition, then choose the “Bicubic” resizer from the drop down box on the right, rather than Bilinear.
To check that video acceleration is working, you should see “[DXVA]” which stands for “DirectX Video Acceleration” in the bottom left hand corner.
VLC Player
For VLC player, click the tools menu and hit “preferences” at the bottom. Next select the big “Input and Codecs” button on the left, before checking the “Use GPU acceleration” box on the right. In the current release (1.1.0) it says “experimental” but don’t worry about it.
 If you do have playback problems and VLC crashes, then simply de-select the setting, or from the start menu under the VideoLAN folder, select “Reset VLC media player”.

ASUS BRAVO 220 Silent graphics card - specifically designed by ASUS for optimal video playback quality with the software above!
That’s all you need to fantastic quality, very low power video playback on your notebook or PC, even if you’re watching the latest High-Definition Blu-ray media!


