

I’ve had a few days to get to know the O!Play HD2 now, and I’m going to take you through it so you can virtually familiarise yourselves as well:
The swish O!Play HD 2 box has been previously covered here on TiS, so check back to see the general details.
What you’ve not seen here is the installation of a 3.5″ hard drive. You see, removing the panel on its underbelly exposes a SATA data and power cable, as well as a little disk tray your drive screws into. The hard drive isn’t compulsory though so don’t worry if you don’t have one spare; it’s only there if you need a boat load of central storage for your music and movies.


With the latest firmware ASUS has added support for huge, 2TB hard drives, so make sure you upgrade. That process itself is also really simple – grab the firmware from the ASUS website, extract it to a USB flash drive, insert it into any of the O!Play HD2′s USB ports, then turn it on and goto Settings -> Firmware Upgrade. It’s automated from here and takes about 2 minutes, then job done!
Movies and Music
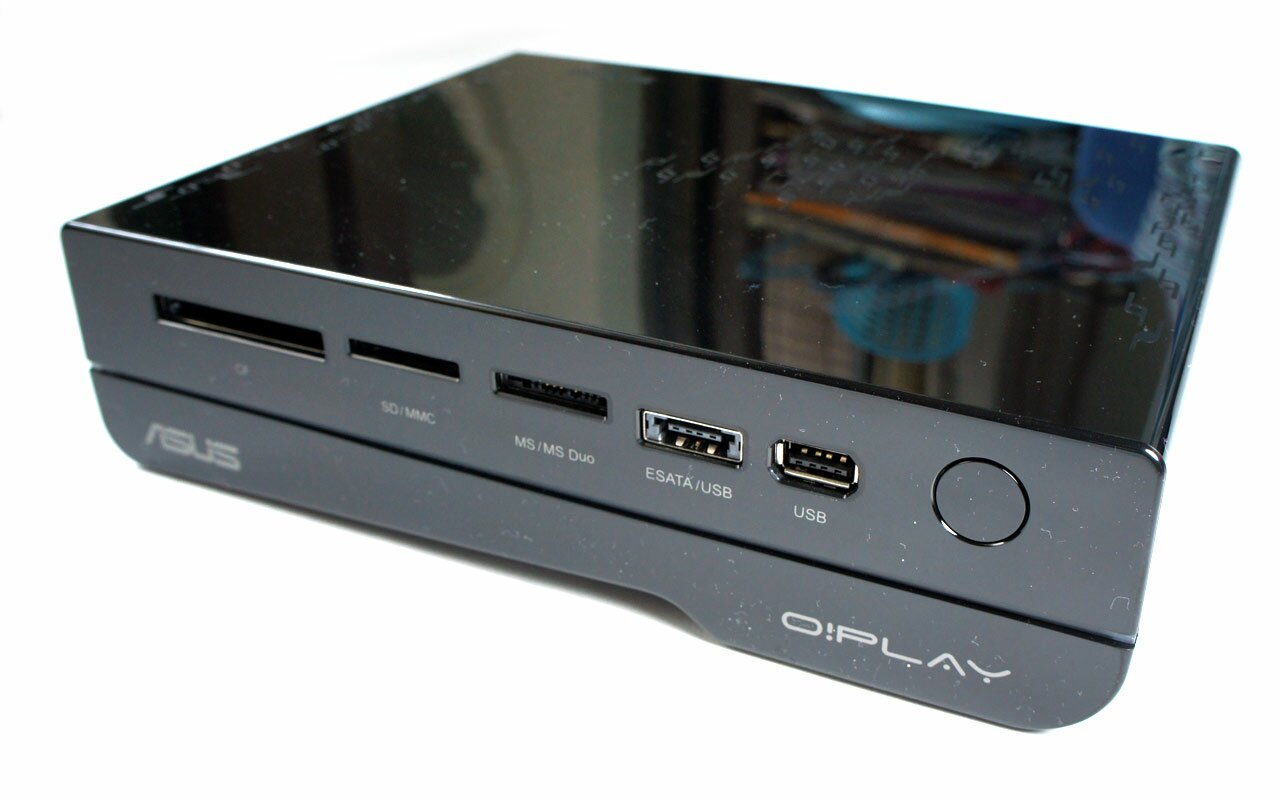
As a media streaming device, the main aim of the O!Play HD2 is to play your movies and music. Firstly things first then: plug in a USB thumb drive, eSATA hard drive, SD card or simply surf your home network and get access to where your stuff is. I personally use a fat, 32GB USB key since most of my home network is wireless (alas, something the O!Play HD2 is without), but you could just as easily surf shared drives or or network storage devices directly from the O!Play HD2.


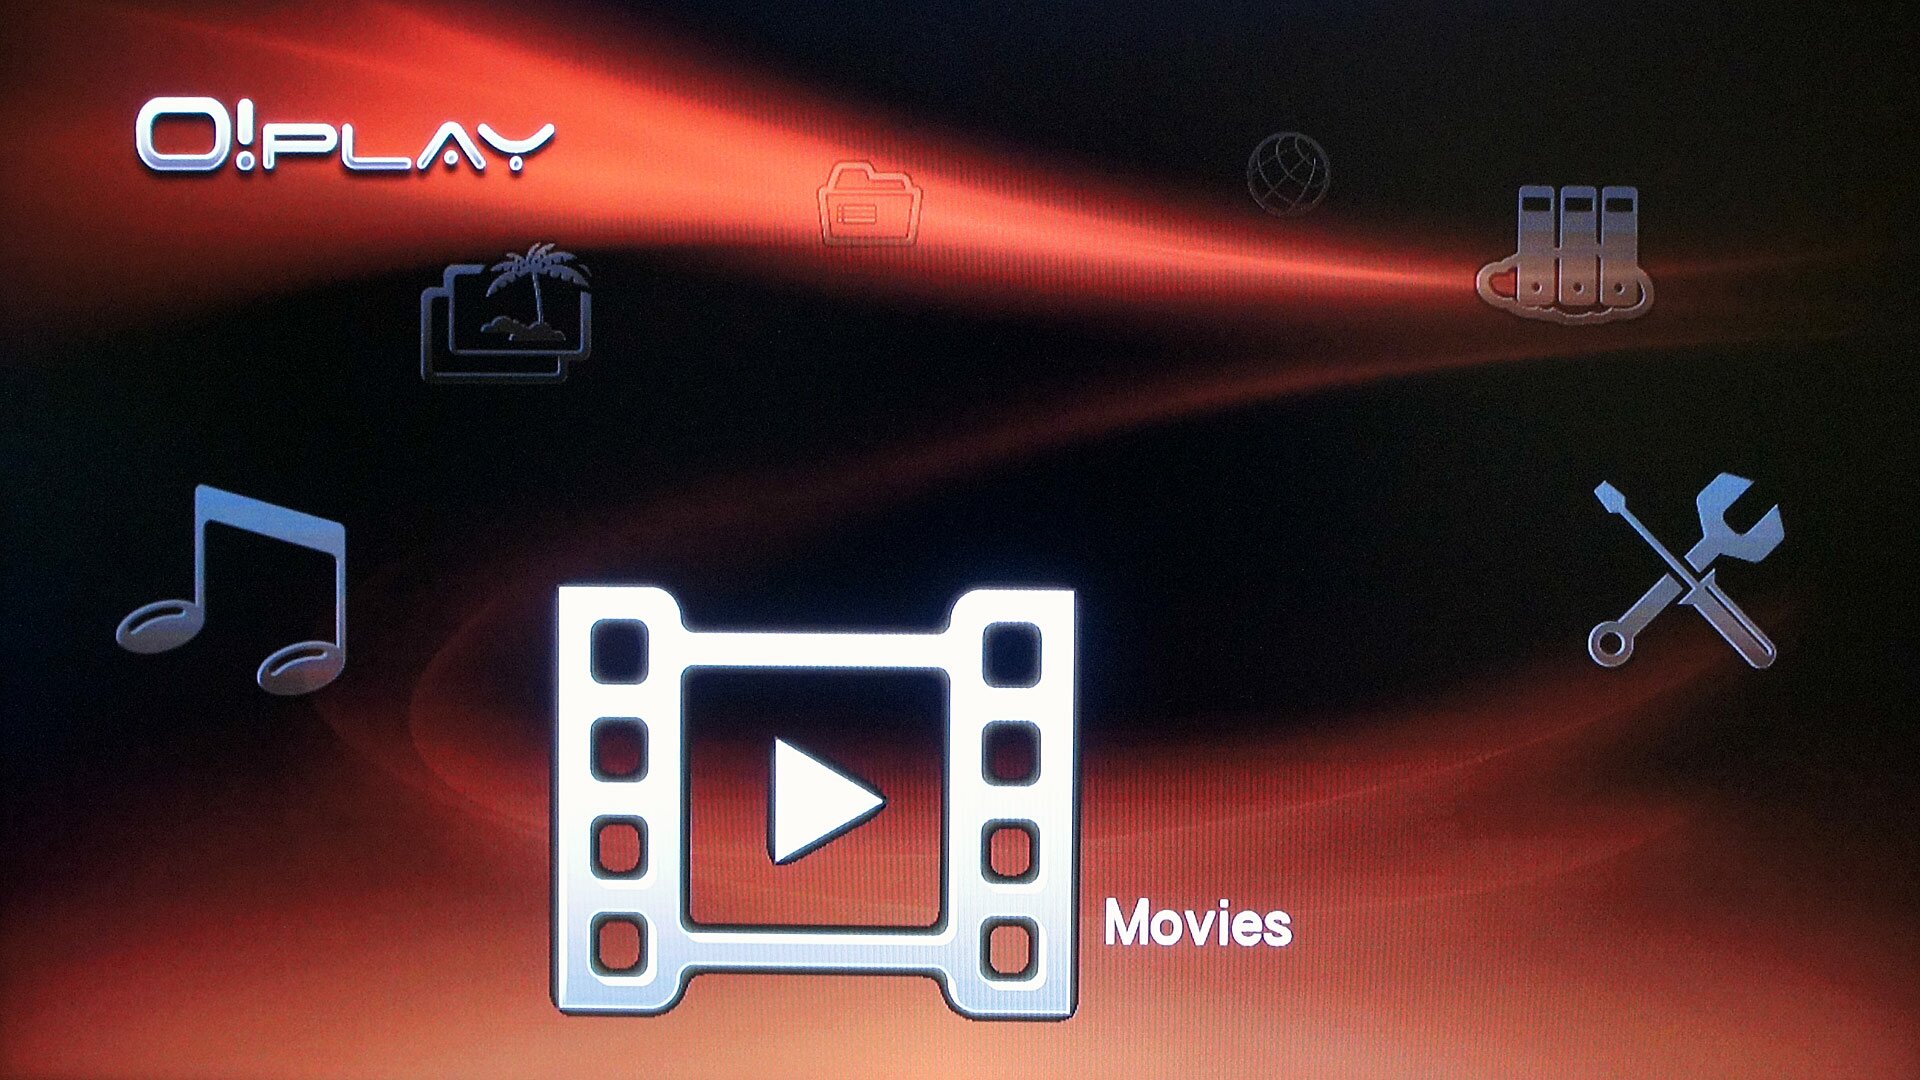
It’s worthwhile noting that you need to select either the Music, Movies or Photo option in the menu depending on what you want, and the device will look for either sound, video or picture files accordingly. The sections list all the files it finds by their filename, but in the Movies section even if you do forget how you name things, by leaving the selection box over the filename for a few seconds and the O!Play HD2 automatically plays a thumbnail preview video in the corner. Very helpful!
Supported file formats include:
Video: MPEG1/2/4,RM/RMVB,VC-1,H.264
Video File Extension: .trp, .mp4, .mov, .xvid, .avi, .divx, .asf, .wmv, .mkv, .rm, .rmvb, .flv, .ts, .m2ts, .dat, .mpg, .vob, .mts, .iso, .ifo
Audio: MP3, WAV, AAC, OGG, FLAC, AIFF, Dolby Digital AC3, Dolby Digital Plus, DTS Digital Surround, Tag ID3, Dolby True HD (Passthrough), Dolby True HD (downmix)
Image: JPEG, BMP, PNG, GIF, TIFF
Subtitle: SRT, SUB, SMI, SSA, TXT(SRT), TXT
The extensive subtitle and language support includes options for tweaking the colours and position in movies too; whether it’s from an additional file like IBX or SRT, or even embedded within the file wrapper like MKV or Blu-ray ISO.
Online Media
 The Online Media services have also been beefed up with the latest firmware, so again, make sure you update! There’s now 1,000 extra internet TV channels to choose from and a new Podcast Media Service on top of the already extensive list of Internet Radio stations, as well as Picasa, Flickr, weather and stocks. I used the weather one now and again and it can favourite a list of places to flick through – so they only need to be searched for once.
Media Servers
In addition to being a Media Player, the O!Play HD2 can act as a network attached storage (NAS) box and media server itself. Logically this does require the installation of an internal hard drive to store the files though. The ‘SAMBA Server’ and ‘iTunes Server’ setting makes the O!Play HD2 searchable from other Windows or Mac PCs within your house, while the ‘FTP Server’ is accessible from outside to those who know your IP. A simple Bit-torrent download program can also be run from within the O!Play HD 2 as well.
Setup
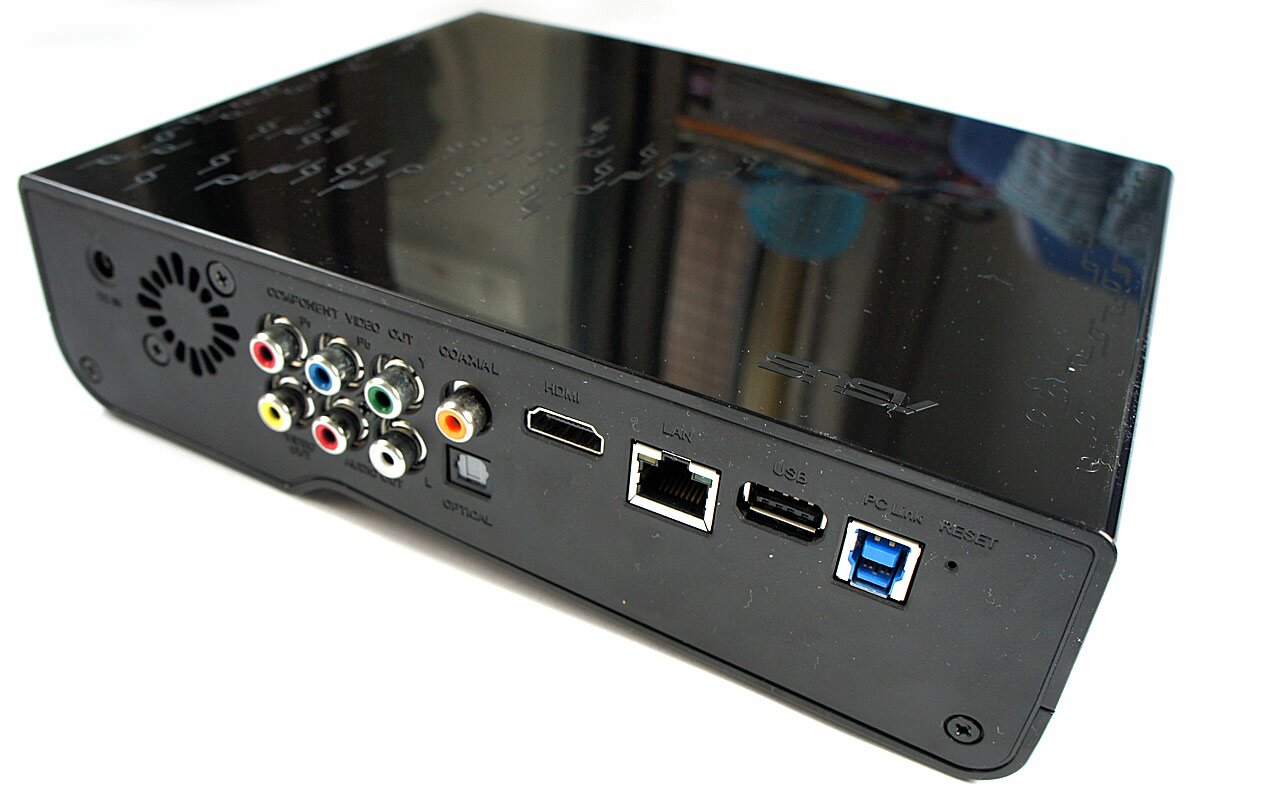
 The somewhat more boring but no less important area – system setup. Key things to note here is that the O!Play HD2 has ’24Hz 1080p display support’, which is another term for letting your 60Hz (or 120/240Hz) HDTV do the 3:2 Pulldown instead of the box. If your TV doesn’t do it, then leave it unchecked.
Using the HDMI Auto function should set the output to the native resolution on the HDTV, although there’s no such feature for component and composite outputs since it technically unable, so those will need to be set manually from the same option. All common resolutions from 480p up to 1080p are included.
On the sound front, the HDMI or S/PDIF can pass through uncompressed LPCM decoded audio or simply the raw feed if you use an external decoder – again the O!Play HD2 gives that home theatre flexibility.
In all, the O!Play HD2 is a versatile media streaming device if you’re after a simple, inexpensive box that can store, serve and play your media. It’s not only more flexible but cheaper than many home theatre PC options, but admittedly, lacks the fun(or stress) of doing it yourself. Whether you own anything from full blown HDTV with home theatre A/V decoder or a simple PC monitor with HDMI and speakers, it has the capacity to work with it. It only lacks a web interface with keyboard and mouse that the full HTPC offers, but we’d argue fewer people are as keen on the idea of surfing the net on their TV, than they are crashing on the sofa and watching their favourite flicks.