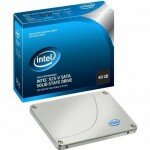
 Win 7 install when using a SSD as the primary OS drive.
With the price of Solid-state Drives dropping to a more reasonable level than ever before, the huge gains in performance by having your operating system and programs installed on a SSD are nothing short of must have. Windows 7 has native support for Trim, and is simply my favorite OS right now so that is what I am going to use in this guide. There are some basic things that need to be done before installing your OS and immediately after the install of the OS. This guide is the first part of a series of guides that cater to all levels of users.
It is always advised to start your installation with either a new SSD or a secure erased SSD, if you are unsure how to do this or are unsure your SSD has been successfully secure erased I suggest you visit your SSD vendors support forum and follow the appropriate guide. Personally I use a GUI Linux Secure Erase based on the Parted Magic ISO to secure erase my SSD.
BIOS Settings before installation of OS on SSD
- Check the board is in AHCI mode. In the EFI BIOS Utility select the advanced tab followed by the SATA mode, select AHCI.
- Enable S1 and S3 sleep in bios.
- Set ACPI 2.0 in bios to enabled
- OS medium source as 1st boot device. DVD or USB drive for example.
Win7 will create and format the raw partition. Do not create a partition let Win7 do so. Select next when prompted and let the installation process continue.
Immediately after successfully completing the Win7 installation and before you proceed with installing the drivers for the chipset and other components.
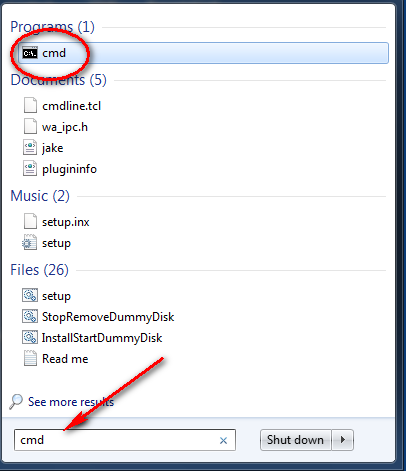
- Turn off Hibernation File: Type cmd in search; right click the cmd symbol select “run as administrator”.
- Type in the following in dos command prompt “powercfg -h off” and press enter.
The following 3 items are optional.
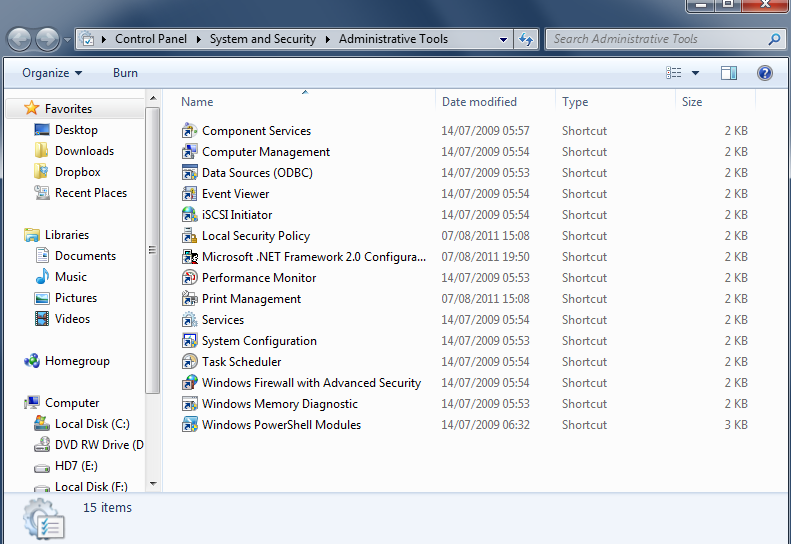
- Short stroke the SSD Drive by 25%: control panel/system and Security/administrative tools/computer management/storage/disk management/
- right click on C drive/ shrink volume. Then simply follow instructions to shrink volume shrink so you have 25% unallocated space set as minimum. What this does is help the SSD drive maintain a higher performance level and prolongs overall drive life.
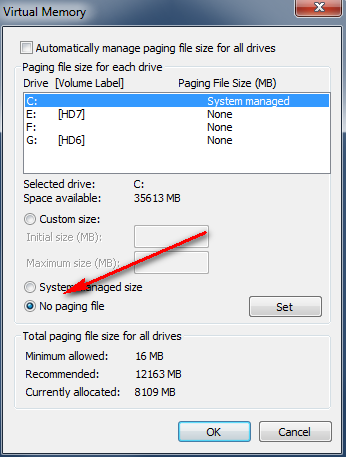
- Turn off paging file: control panel/ system/advanced system settings/performance settings/advanced/virtual memory/change click no paging file – click set and apply – ok. (Restart later.) If you want to use a paging file for whatever reason I suggest you set the minimum size to 1000mb and the maximum size to 1000mb. (Restart Later.)
performance settings/advanced/virtual memory/change
click no paging file – click set and apply – ok.
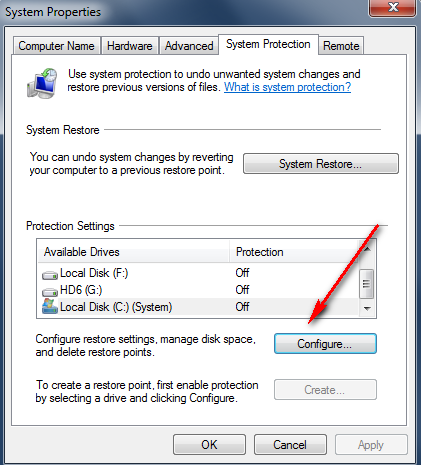
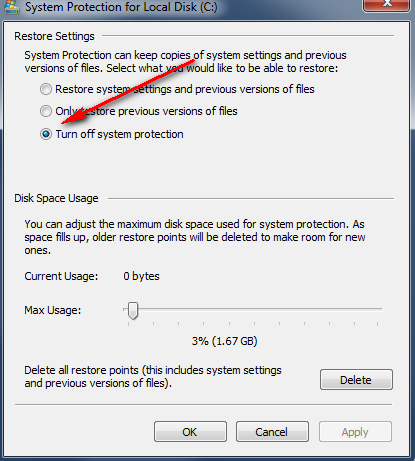
- Turn off system protection: control panel/ system/system protection make sure all drives are off especially C if C is your SSD drive. There is no need for this function if you are making system images of your OS drive.
There are a number of additional tweaks that can be set to wring every last drop of performance from your system and to ensure the longevity of your SSD way beyond the manufactures warranty. They will be covered in part 2 of the SSD OS install guide. But for the majority of users these are the key settings that should be changed before starting to install any of the chipset drivers. This SSD setup guide can be read in conjunction with the OS Install guide found here. Once you have completed the chipset drivers run the Windows Experience Index and enjoy your new system.







Dagmar